
You want the best out of your golf cart. Well, choosing the most appropriate in terms of brand, quality, warts-and-all, goes a long way into getting a bang for your buck.
However, you can still get the best out of your club car by doing specific modifications such as lifting it.
There are various advantages of lifting a golf cart.
For example, a lifted golf cart gives you an edge on some rough terrain. Plus, the unique look lets you stand out in the crowd.
Check out the following golf cart lift kit reviews.
Table of Contents
Should I Lift my Golf Cart?
The decision to lift or not depends on various factors, such as the terrain.
Of course, the ordinary golf cart may not be high enough for some of those places that you frequent, such as the farm.
In the not so far away past, golf carts were meant for the greens.
You get the idea; flat surfaces with extremely short grass.
However, the golf carts have moved past the golf courses into residential communities, beaches, backcountry areas, retirement communities, educational institutions, and hospitals, among others.
As a result, outfitting the golf cart may be a bucket list item to make them versatile.
Lifting a golf cart may cost a pretty penny, and there needs to be an excellent reason for this. It is not up for debate that a lifted vehicle has some aesthetic appeal.
Of course, we all love some attention, and especially so if it comes from our automobile or vehicle. You can install outside the box features, but the ultimate goal is functionality.
Some great ideas include outfitting the all-terrain tires, heavy-duty leaf springs, seatbelts, and grab bars.
If you are into DIY and the like, then the build your own golf cart idea may interest you.
Can You Lift A Golf Cart Without A Kit?
It is possible to lift the golf cart without the need for expensive lift kits.
There are various ways of pulling it off, and it includes using aftermarket parts to build your own.
No doubt, you’re going to need some special hands-on skills, and it may be a bit harder than you think.
The other viable option includes making some modifications or even fabrication of new parts.
For the majority of folks, fabrication is more fun, and it gives you the freedom to choose between brands. Furthermore, you can be a bit thrifty while selecting the best parts.
The benefits of lifting a golf cart without a kit
Lifting a golf cart keeps you ahead of the game in terms of versatility.
Typically, it is possible to raise your golf cart without a kit. The advantage is that it saves you money spent on kit purchases and professional installation.
Doing it yourself also removes the limitation associated with a fabricated kit. As a result, the process of achieving a particular look becomes pretty much more straightforward.
It is also a way of challenging your mechanical skills and having fun while you are at it.
As a professional or even an amateur, challenging yourself from time to time is essential. There is no better challenge for those with mechanical skills than lifting a golf cart without a kit.
How do you make a Homemade Lift Kit for a Golf Cart (Step by Step)
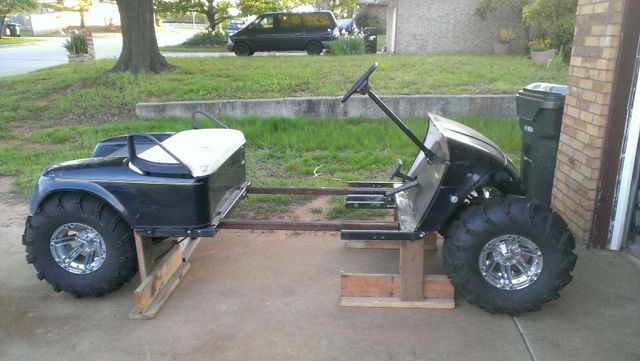
Source: Pinterest
Without mincing words, you will need some special skills and tools for a homemade lift kit.
A simple mistake will take you back several hundred or even thousand dollars. If that happens, well, then it would have been better to purchase a lift kit for your golf cart.
But on the bright side, a homemade lift kit for a golf cart is the most rewarding.
Before you can go about lifting your golf cart, please note that you cannot do it without a lift kit. You can forgo the fabricated lift kit and instead opt to create your own.
Some of the crucial parts you are going to need to include longer shocks, springs, axles, and A-arms.
A support plate may also be necessary, at least for most golf carts. The support plate goes directly to the golf cart and attaches your custom lift kit to the wheels.
The tools you need from the project include wrenches, drills, screwdrivers, and others.
Remove the cartwheels
You need to use the right tools to remove the cartwheels carefully.
Keep the nuts and bolts in one place and closer to where they come from.
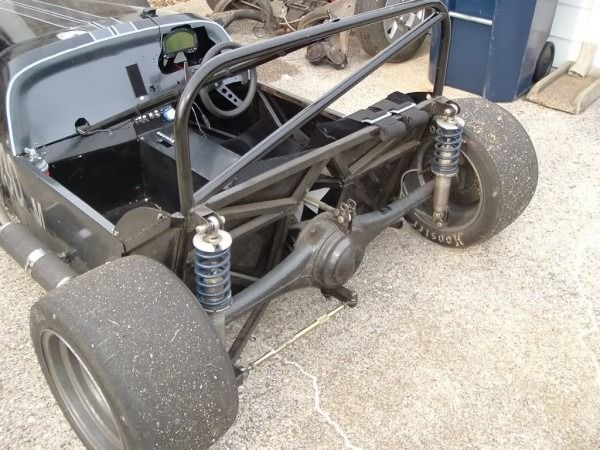
Source: Pinterest
Off with the axles
Handle the axles carefully, a process that requires mechanical skills. If you’re having trouble with the axles, let a professional do it for you.
There is no harm in asking for help, and it goes a long way into ensuring your safety and durability of your cart.
You can move on to the A-arms if you’re comfortable with this step.
Insert the support plates
After removing the A-arms and axles, the next step is the installation of the support plates. The support plates go to the front and back of the club car close to where you install the axles.
Usually, the objective is to provide extra support strength for the lift kit.
Install springs, shocks, and A-Arms
This is why you are the new set of A-arms and position them adequately. You will also need to add springs and shocks to the arms for extra support.
Most people will require an extra pair of hands with this step.
Put on the new axles
New and longer axles are most appropriate for the best results. It is critical to carefully balance the front and rear of the club car to ensure it runs smoothly when driving.
A wobbly golf cart will not be the best experience, plus it can cause repair problems that cost a pretty penny.
Sufficiently adjust the angles
Inarguably, the camber and castor of the golf cart will change after the lifting process. Steering problems will happen if you fail to tweak and center the angles.
You can seek the help of a cart professional if this step proves an uphill task.
Things to keep in mind
The model of your golf cart will determine the axle style and support plate you use. Other considerations include the various elements you will need to weld. Some types of wheels will require proper balancing before you can enjoy riding it to the sunset.
Comprehend the various hurdles associated with a personalized lift kit, especially if you lack proper mechanical skills.
Well, it could be a case of shooting yourself in the foot if appropriate mechanical skills are not available.
Possible complications include damage to the frame or chassis, which may cost you an arm and a leg to replace or repair. Wrong installation will also affect the appearance of the golf cart, and that is not something you want.
Also, keep in mind that our DIY lift kit can significantly affect the safety of the club car. For example, misalignment or wrong installation of the tires can cause an accident.
Types of Lift Kits
The number of golf cart enthusiasts is growing by the day, mostly because of the love for the outdoors. But if you are planning on carrying an extra amount of weight, then you may need to consider larger tires. Lifting it will also give it some impressive ruggedness and workability.
It is not a mistake if you do it for the show, but the absolute is functionality.
If you are up for the idea of lifting the club car, then a lift kit is a convenient and desirable prospect.
The following are some of the significant types of lift kits for your golf cart.
Drop Axle Lift Kits
If you are in the market for a stock spindle with a greater radius, then Drop Axle Lift Kits is your man for the job. It uses a longer axle to give you a higher ride.
The good thing is that you don’t have to replace a lot of other things and that allows you to be a bit thrifty.
You get the right amount of front suspension height and travel without necessarily having deep pockets. The kit is one of the most economical, not to mention they are super easy to install.
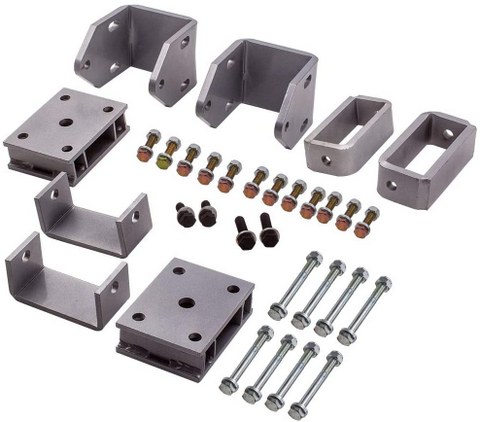
Block Lift Kits
Block Lift Kits enhance the appearance and height of your golf cart. The system is usually a spacer between the frame and suspension, with the flexibility and functionality to boot.
The lift kits are also simpler to install and inexpensive. Without a doubt, Block Lift Kits will give you a lifted and the coolest look in the block. And the good thing is that you don’t have to break the bank.
Spindle Lift Kit
This type of lift kit goes directly into the factory suspension. It replaces the spindle size and length. The installation process of the spindle lift kit is what we can call a walk in the park.
Various benefits accompany the spindle lift kit. For example, you can install new bigger wheels because of the wider stance. You also don’t need a nice chunk of change to afford this lift kit – probably something that excites most of us.
Best of all, you are sure that everything is going to work according to the plan. It fits directly with the factory suspension, and you don’t need to do further modifications.
A-Arm Lift Kit
Typically, this is for the front suspension. The characteristic circular tubing of the A-Arm Lift Kit provides for a higher clearance and comfortable ride.
Well, the fact that you also need a lift kit for the rear suspension seems like a disadvantage, but it is not. The lift kit sure gives you a bang for your buck, and it is easy to install.
A bonus is an aesthetic appeal to keep the heads turning.
Independent Rear Suspension Kits
As opposed to the typical leaf springs, these independent rear suspension kits have A-shaped control arms for the rear suspension. As a result, vertical travel is without scruples.
They move up and down without any obstacles, and that makes everything easier.
The unit sometimes comes with the front a-arm kit or other add-ons. The rear suspension kit may give you a sticker shocker compared with blocks, but they are worth every dime. That is especially so if you are planning on using them on rough terrain.
Custom Kits
You will get specialty kits, customized to your needs. In the majority of the cases, the custom kits blend the various aspects of the above kits.
Well, if you are the kind of person that wants something specific, why not!
Almost always, the custom kits will cost you a pretty penny. However, that does not mean they are the most convenient or better. The custom kits are usually trial-and-error units.
Club Car Lift Kit Reviews
The best club car lift kit mostly depends on your needs, and of course, the size of your pocket.
For example, the block lift will make you taller than everyone else. On the other hand, a spindle kit is perfect with custom wheels.
An A-arm is for the vehicles that tackle new terrains. The focus is usually on functionality. Please note that some other modifications may be necessary to get the best bang out of your buck. We are talking about adjustments in clearance, height, and more extended suspension travel.
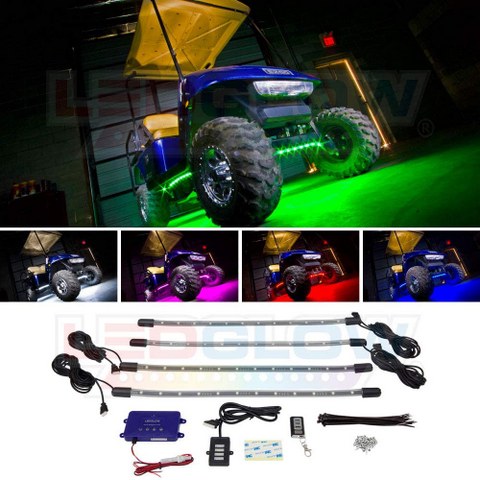
Among our favorite recommendations include LEDGlow 4pc Standard Million Color LED Golf Cart Underglow Accent Neon Lighting Kit for EZGO Yamaha Club Car. The underglow lighting is water-resistant and on top of trends. The lift kit is one of the best ways to stand out in the crowd without breaking the bank.
The installation instructions are not a hard nut to crack, and the mounting hardware is easy to use.
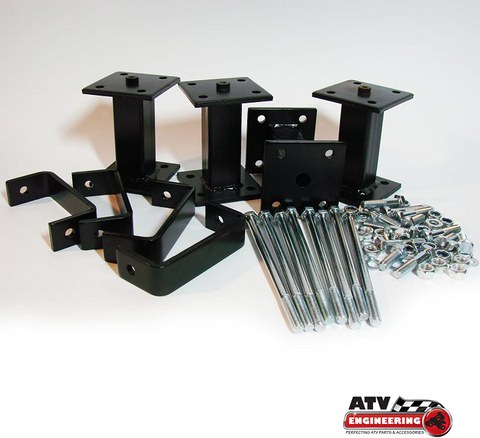
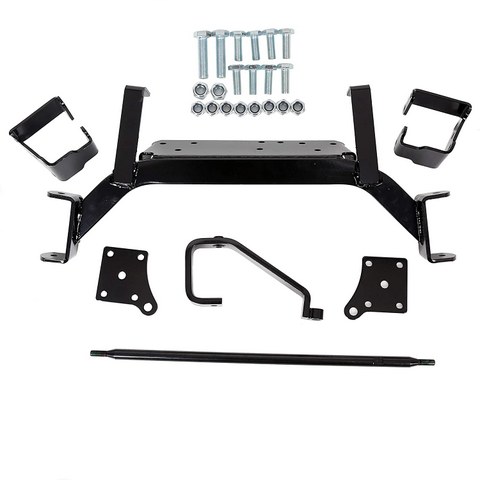
Another excellent recommendation is EZ-GO Electric Golf Cart 5″ inch Lift Kit – models 1980-1994 for the 5-inch EZ-Go Electric Golf Cart lift kit. The lift kit is all about simplicity and sufficient ground clearance. In essence, you can install the 23-inch tires and make your golf cart versatile.
The step by step instructions is as easy as it gets to follow. No welding or cutting is necessary. These are high-quality performance parts that explain the price tag.

Finally, the 10L0L Rear 4-Leaf Spring Kit for EZGO TXT Golf Cart 1995-2013 is a favorite of many folks. It comes with U bolt nuts, stainless sleeves, and rubber bushings. There may be some stiffness on the ride, but that is not something you can’t handle.
The kit is suitable for a wide variety of golf carts, and restoration instructions are easy to follow. You will notice that other parts are heavy duty and therefore durable.
How to Lift a Yamaha Golf Cart
Lifting a Yamaha golf cart is not rocket science if you have the right tools, mechanical skills, and you don’t have a problem following instructions to the letter.
Some of the tools and equipment that you require include a floor jack, wheel chocks, jack stands, small pry tool, and needle-nose pliers.
Others include socket set wrench set, parts cleaning solution, a mini impact driver with sockets and attachments, torque wrench, and grease gun.
You also need personal safety equipment, such as exam gloves and work gloves. Safety glasses will also go a long way into ensuring your safety.
Front
Secure the Cart
Before using the floor jack, make sure that the vehicle is as safe as possible. Apply the parking brake and choke the rear wheels. Unless instructions specify otherwise, it’s always wise to assume that fasteners such as bolts, nuts, and washers, among others, will need cleaning, lubrication, and inspection for reuse.
Remove the Front Wheels
In some cases, there are replacements for some of the fasteners that come with the kit.
Loosen the lug nuts and lift the front end sufficiently to accommodate larger tires and lift kit. Lower the cab onto the jack and roll the floor jack away.
Remove the front wheels by carefully pulling the wheel hub assembly off.
Remove the cotter bolts and pins attaching to the spindle – “Flange Bolt” – and carefully pull the spindle off.
Remember that you will reuse the thrust washer at the top and bottom of the spindle. Please note the spindle markings, P and D, to represent the passenger side and driver side, respectively.
Install the New Wheels
Lubricate the top and bottom of the bushings and install the thrust washers or spindle bushings on the new spindle.
Follow it up with the spindle into the yoke. Torque the spindle bolt according to the specifications by the manufacturer, and then the cotter pin.
Use the wheel bearing grease on the wheel hub assembly before installing the steering arm bolts. Tighten according to specifications and install the cotter pins and grease the spindle.
Next, apply some pressure on the wheel hub assembly and install the nut. Tighten it while at the same time spinning the wheel hub assembly. You should make sure that the wheel hub assembly is spinning smoothly.
Give the nut a quarter-turn and install the cotter pin as well as the dust cover. Also, do the same for the other side.
Use the new lug nuts to install the bigger wheels and remove the jack stands and lower the cab. Tighten the nuts according to the manufacturer’s specifications and check the toe-in. It should be approximately 1/8″.
Rear
Make the cart safe
Make the cab as safe as possible before using the floor jack by choking the front wheels and removing the key from the ignition.
Even though not necessary, remove the rear body section to make it easier for you.
Uninstall the wheels
Loosen the lug nuts and remove the sway bar. Lift the rear end to accommodate larger tires and the lift kit. Then lower the vehicle onto the jack stands, which are on the outermost frame sections – make sure of this.
Make sure that the floor jack supports the center section without lifting it and then move on to uninstall the rear wheels. The new tires come with fresh lug nuts, and you don’t need to reuse them.
The innermost section
This is where you will appreciate supporting the innermost section with the floor jack. Remove the top bolts carefully.
Well, handle the floor jack slowly while carefully watching the choke cable, vacuum lines, and fuel lines. Keep an eye on the electrical wiring as well. However, you can replace anything affected during this process.
Bring down the center section and move on to the next step.
Installing the kit
Where the shocks used to be on the frame section, install the shock riser. Use the provided hardware. The shocks shall not be binding.
If they are, oversize the mounting holes in the lower section of the shock.
Using the provided hardware, install the sway bar bracket and enlarge the mounting holes if necessary. Attach the sway bar and install the new tires. Use the fresh lug nuts.
Raise the rear using the floor jack and then remove the stands and lower the cab.
Tighten the lug nuts according to recommendations. Recheck all fasteners and bolts based on the recommended torque values. Test drive the golf cart and oversize the mounting holes if you notice any binding shocks.
Conclusion
Always keep your eye on safety and proper installation no matter your choice of kit. Some of the aftermarket golf cart lift kits recommend professional installation.
That is mostly because they interfere with particular torques or steering angles – better safe than sorry.
If that is something you are comfortable doing in the comfort of your home, go for it. Be careful not to affect the structural integrity of the golf cart while at it.
Please note that there are numerous golf cart lifts on the market. We have mentioned three of the best above, and we hope to point you in the right direction.
Invest in the best, and you will never have to complain about the quality and your safety.

